Thank you for joining me for Day 2 of redoing your own pantry! Just in case you missed it, be sure to have read Day 0 and Day 1 here!
By Day 2, we a clean slate to your pantry – literally! We stripped down our clutter to what brought us joy, removed all pantry shelving, filled in the holes, and scraped away any excess bulges. (If you read my previous post, you’ll know that we actually had to go pick up some items at Home Depot. We also figured we would get inside corner brackets to attach everything, but we found the brackets did not go so well. Instead, Liquid Nails was the way to go!)
Day 2
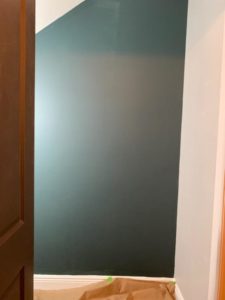
Before getting into our work, we should let you know that in our materials yesterday, we did not mention buying any type of paint, wallpaper, or any other type of decoration because our plans were to use what we already had. Left over from our office renovation, we had an entire gallon of “Midnight in NY” – a deep Slytherin type of green. After gathering all the necessary materials, for painting, we began by sanding down the walls in question to be painted. We used a 100 grade grit for the sand paper, making it just rough enough to do some removals wherever were necessary. After sanding, we wiped our slate clean with a damp cloth.
Painting
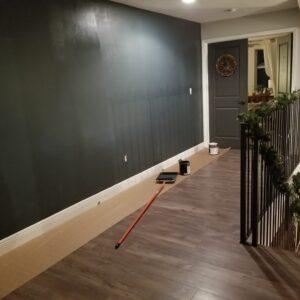
Since we had our green paint out, we decided to also tackle another desired project, an accent wall, pictured below. When painting walls, we use two methods: (1) My wife tackles the perimeter of whichever project, I tackle the rolling part. (2) For space purposes, she tackled the accent wall while i did the pantry wall, then we switched when each of our tasks were completed.
My wife is really good at those perimeters – she says it reminds her of putting on make-up since she uses brushes! She has such great technique to make straight lines with the brush by slightly pressing down on an angled brush and slowly brushing along the edges. At least, that’s my understanding of it, since I very clearly do no have any deft in getting that done.
For rolling on the paint, I do two things – try to get as long of a stroke as possible, going from top down, and traveling in very small “W” patterns. By doing long strokes, when the paint dries, I believe it allows for less chance of the eye seeing separations, and instead capturing the wall. By doing the “W” pattern, I can travel back and forth, filling in the self-created gaps, resulting in a smooth finish.
Shelf Making
Next, while the first coat of paint dried (yeah right marquee – only one coat necessary!), we wanted to start on our shelves. After attempting brackets and not liking the result, we went with liquid nails and tape method. For our wood, we used a type of wood called “poplar.” Our intentions were to leave the wood raw, so the the slight greening of this wood attracted our eyes the most. I was going to link to the wood used, but for some reason, Home Depot does not have it in stock via their online. Best I can do is tell you our wood for the shelves is 1″ X 12″ X Cut to size, and the lips of the shelves are 1″ X 3″ X Cut to size.
Side Note: Having completed the project at this point, my words of advice are to be very careful with spilling or overflow of the liquid nail. While overflow does not matter as much on the under part of the wood, the glue that gets left on the top is quite unsightly and laborious to remove. Save yourself the struggle! I would also wear gloves. I did not, and regretted it after as my hands are now crusty from residual glue, and repeated scrubbings!
Using a table to prop up the shelf, configuring which lip was to go with which shelf, determining the front, up and down of each shelf, we then put the shelf face up. Next, with the lip face down on the ground, we liquid nailed a straight-ish line across the to-be top. Afterwards, we brought the lip to meet the wood, lined up the edges as best as possible, then squeezed the two together. We then used painter’s tape (we had 2-inch think Green Frog tape) to hold the wood in place on each side. Starting with the right side and working towards the left, we continued to adjust and squeeze the wood to as close to perfect meeting points as we could make, then taped the two to hold it together. We then set aside and continued on the rest. We chose to actually make 5 shelves, though we were quite certain we would only need 4, just in case something happened along the way.
All this began to work us up a sweat, so it meant it was time to quit! Join me tomorrow for Day 3! Click Here!


Leave a Reply