It is the third and FINAL DAY!!! You too can redo your pretty pantry in just three days, and I have to say, I LOVE the way this turned out. By no means do we consider ourselves carpenters, so if you are one, please feel free to give us feedback on what we could have done better! I would love to also hear what everyone else thinks! Are you going to be inspired to do your own pantry?
Day 3 – Final Day
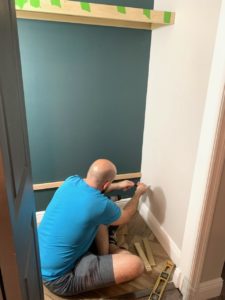
Surprisingly, this was the longest day yet! That would be pretty cool if there actually was a stud finder, because that was our biggest issue – running into objects inside the wall. So, here is what happened!
Installing the shelves
First, we held up the shelf, leveled it, and marked the underside along the corners and adjacent walls. Then, we spaced out the placement of anchors by holding up the supports, leveling them and drilling in a screw that would penetrate the wall, through the support. We would then unscrew the supports and screw in the anchors. (Here is where I would offer some huge advice to any reader trying this: We chose Drywall / Hollow wall anchors that could hold 75 lbs. Problem is, the anchors were plastic. There are some 40 lb anchors that I know of that are metal, so if they have the metal ones with more weight, you should definitely get those. We had to use some on the small outlet of a wall for some reason, so we will just not pile a lot of weight on that side. Either way, I think 40 or 75 lb anchors will be fine – I don’t imagine us putting that much weight on the shelves anyway). Next, we screwed in the supports, and placed the shelf on top.
THIS IS ALSO A HUGE TIME SPENDER BECAUSE THE ANCHORS MUST BE SCREWED IN BY HAND (UNLESS YOU HAVE A FANCY SLOW SPEED DRILL)
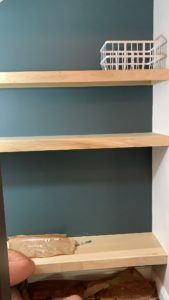
Thankfully, the first shelf went beautifully. Since it’s the top shelf, you actually can see a bit of the underside, so the fact that it went up so well was pretty spectacular! It also gave us the confidence to move forward with the next shelf, which we decided should be the bottom shelf. Being accustomed already to storing a step-stool under the last shelf, we decided our placement for the new bottom shelf had to accommodate that item. Again, we followed the same steps as before, placing the shelf on top. Here, we did run into our first anchor issue, towards the bottom left, so we had to replace the support and screw in a new hole, then remove the support and screw in the new anchor (yes, we left a hole behind the support – you can’t see it anyway!
We then determined to figure out the placement of the inner shelves, so we measured the distance from the bottom of the lip of the first shelf, to the top of the bottom shelf, the distance from the bottom of the first shelf to the bottom of the lip, and subtracted that number from the first number, twice, because we were going to put in two more shelves. We this new number, we then divided it by three, to give us three equal spaces. Using that number, we held up the shelf below the first shelf and followed the steps. This was the hardest shelf because of the anchor issues we had. Truthfully, it would have went way faster if we would have used the metal anchors. Never again will I make THAT mistake! I mean, why use plastic ones to begin with! So silly! With the final stretch underway, we plowed through to complete the last shelf and could not have been more proud!
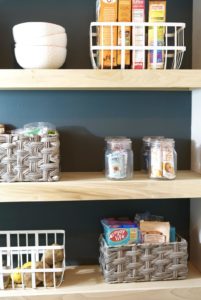
Final touches
My hand in particular was getting quite tired from all the anchors, so throughout the day, we removed the tape from the shelves and scraped off any liquid nail that seeped over. This was also a tedious task! We found a combination of using a wood chisel – very carefully – worked best for the removing most of the spillage, and then a 220 sand paper to finish the job. Note: also very time consuming!
For the complete and final step to renovating your pantry, treat yourself to new containers! Keep a large amount of the same materials throughout for visual pleasure, and balance the colors you do choose to incorporate! If you choose to paint your walls white, it’s really a blank canvas to choose just about any color scheme you want! If you paint the wall, like we did, then your color choices must not only go with the wall choice, but realize that extra colors will take away and potentially conflict with the harmony of the wall color. Let us know what you think!


Leave a Reply